
How can I install and manage ZeroTier on TinyPilot?
This article explains how to connect to your TinyPilot remotely using ZeroTier, a tool for creating a fast, secure, private network.
ZeroTier offers free accounts, and you can configure ZeroTier's Zero Trust Network Access software on your TinyPilot in less than 10 minutes.
Pre-requisites
- A TinyPilot device
- A ZeroTier account (accounts are free for personal use)
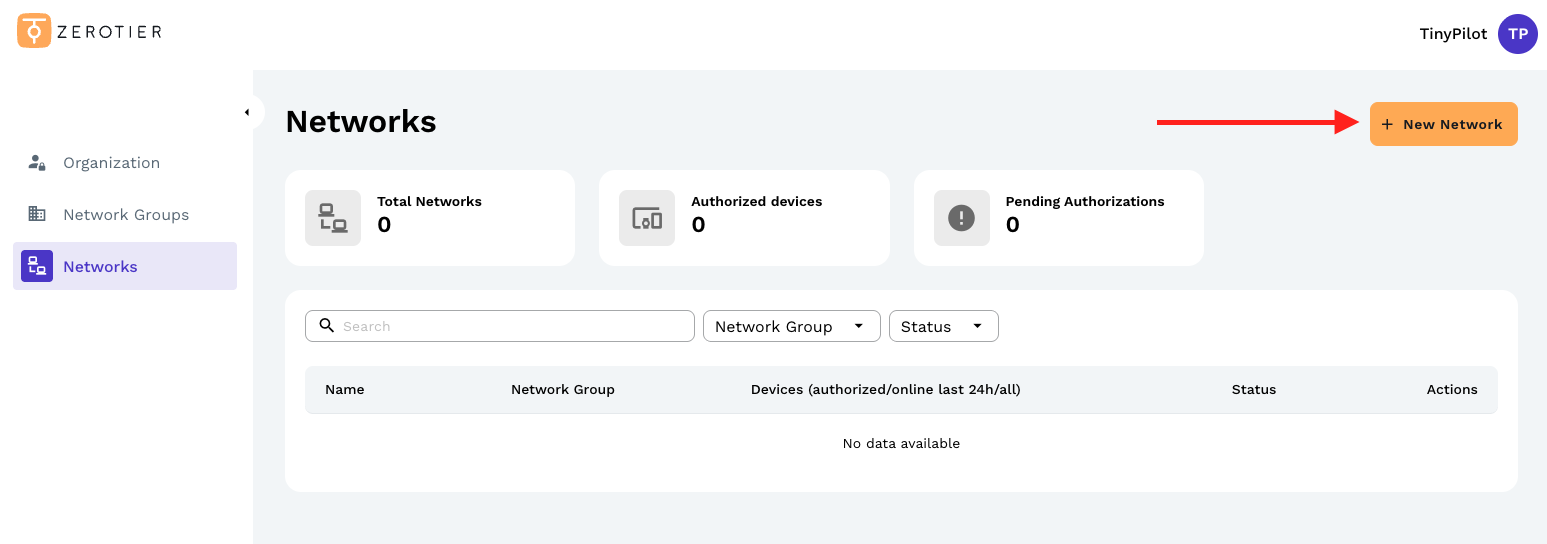
Create a network in ZeroTier's dashboard
ZeroTier works by adding devices to a defined ZeroTier network. When you create your ZeroTier account, create a network so you can add devices.
Install ZeroTier on your TinyPilot
SSH in to your TinyPilot device and enter the following commands to install ZeroTier's client:
curl -s https://install.zerotier.com | sudo bash
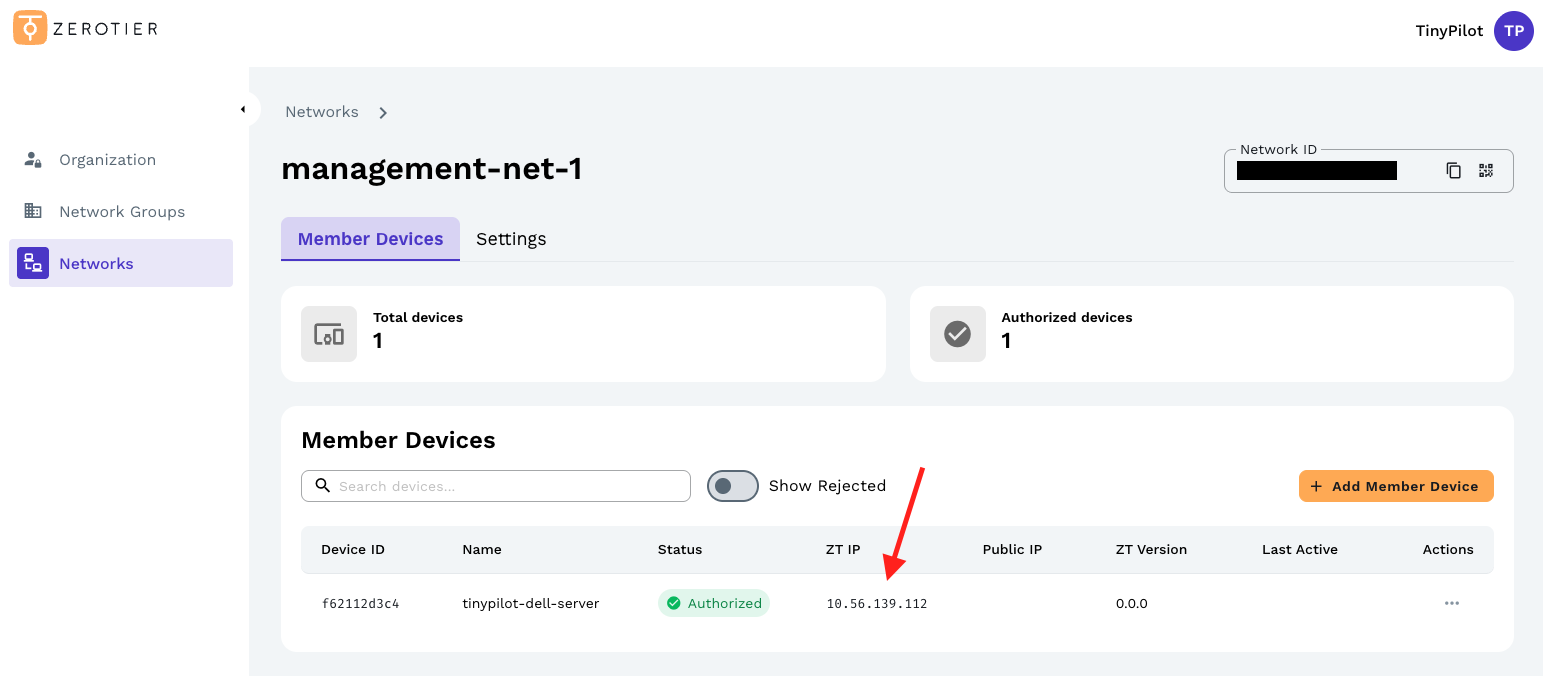
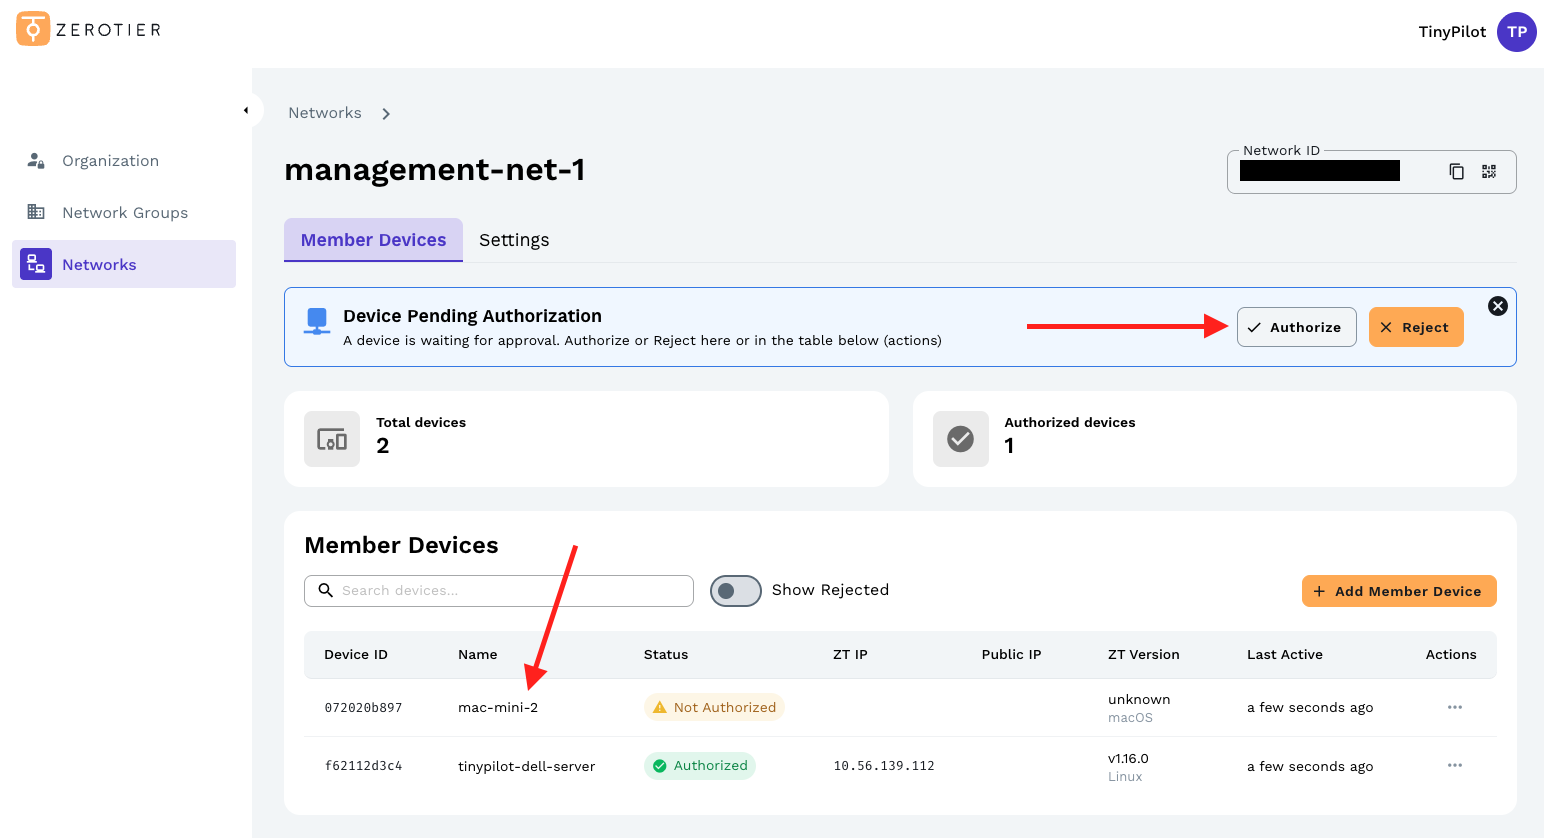
At the end of the installation, ZeroTier will print a ZeroTier address that joins your TinyPilot to your ZeroTier network. Copy the address and use it to add a Member Device to your network in the ZeroTier Networks tab.

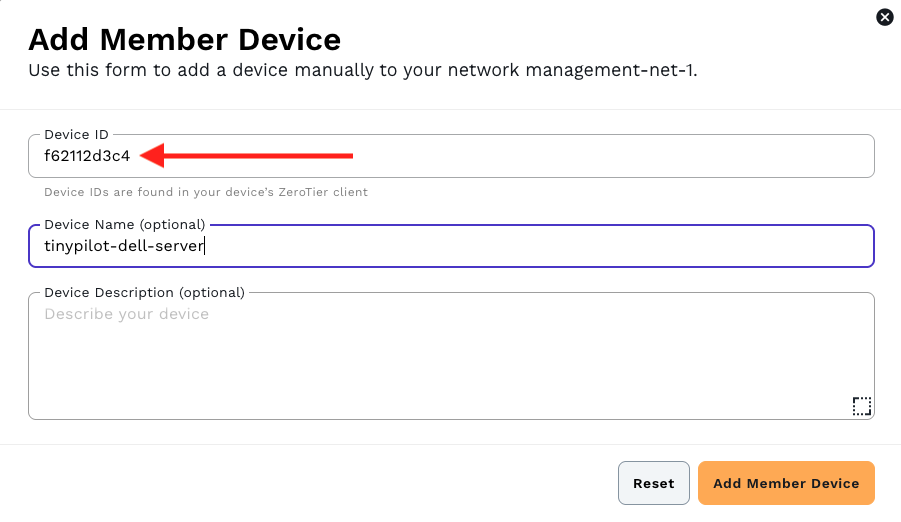
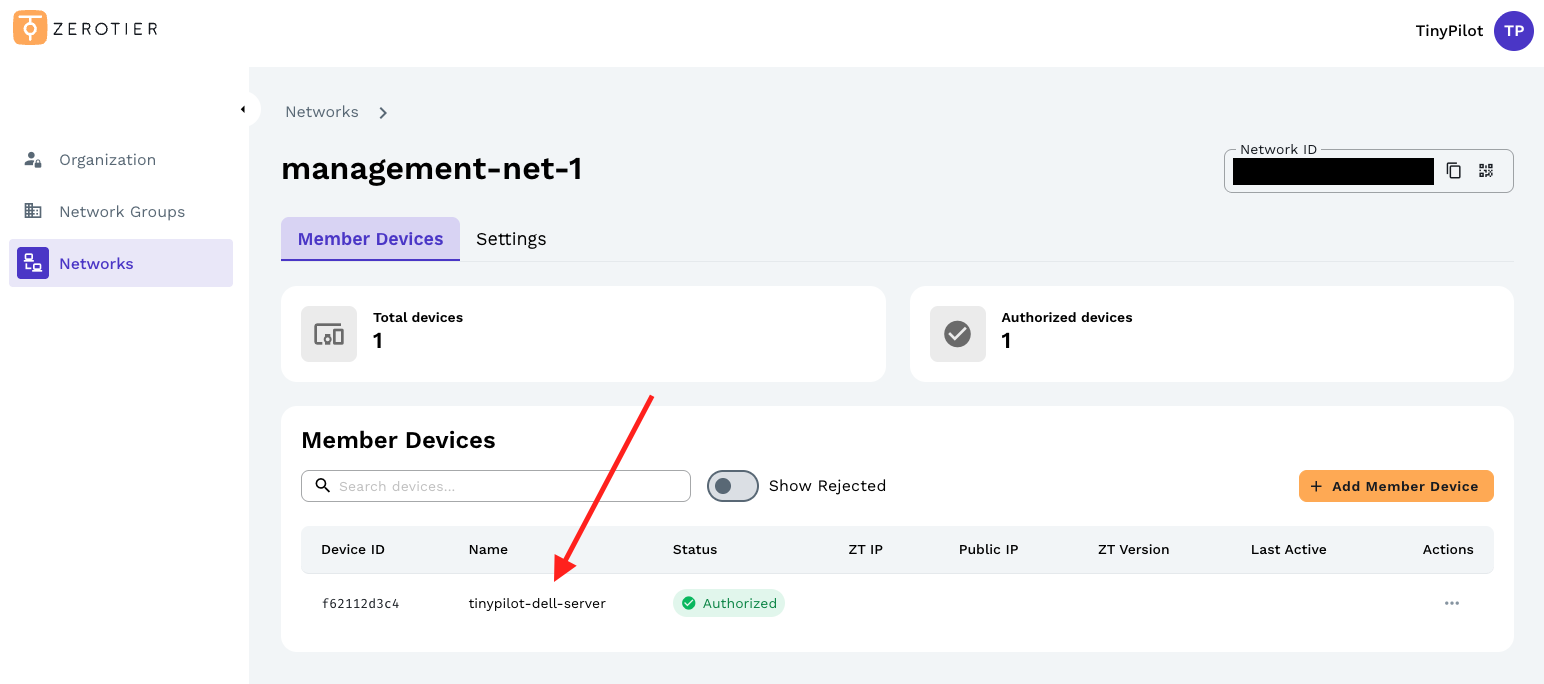
When you've added the Member Device using the code from your TinyPilot SSH session, you should see the TinyPilot listed as a Member Device in your ZeroTier network.
Join TinyPilot to your ZeroTier network
Now that you have authorized your TinyPilot device for your network, you must join the network.
Run this command in your SSH session, replacing<NETWORK-ID>with your 16-digit Network ID.
sudo zerotier-cli join <NETWORK-ID>
You should receive a 200 join OK response in your terminal. Refresh the ZeroTier Networks tab and your TinyPilot should now have a ZT IP.
Install ZeroTier on your computer
To access your TinyPilot device over the Internet, you need to join your computer to your new ZeroTier network. Note that this is not the computer that TinyPilot controls but rather the computer you use to access TinyPilot in your web browser.
To add your computer, download ZeroTier, and follow the installation instructions.
Join your computer to your ZeroTier network
Once ZeroTier is running on your computer, navigate to "Join New Network."
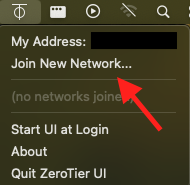
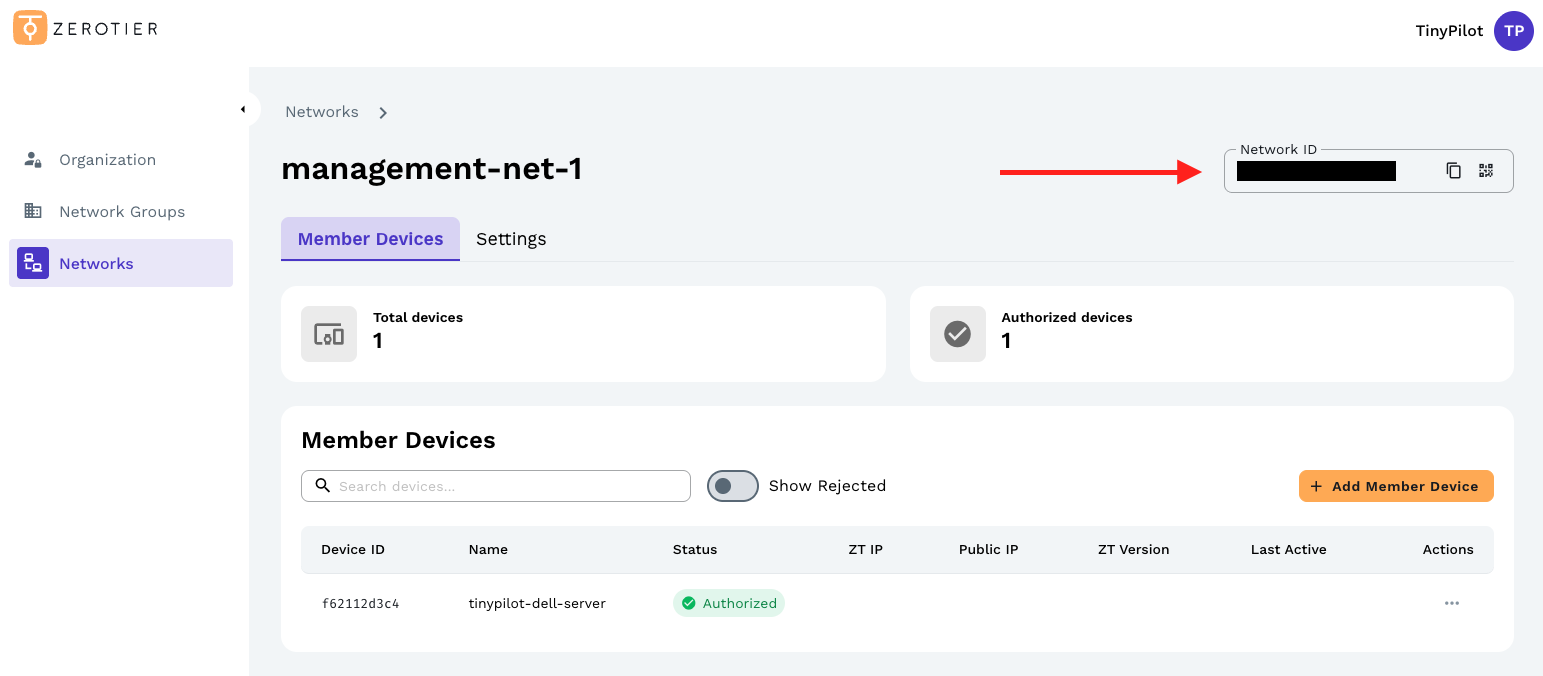
You will be prompted to enter a 16-digit Network ID.
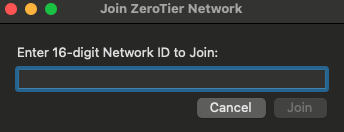
You can find this 16-digit Network ID in the ZeroTier Networks tab.
Authorize your computer as a Member Device
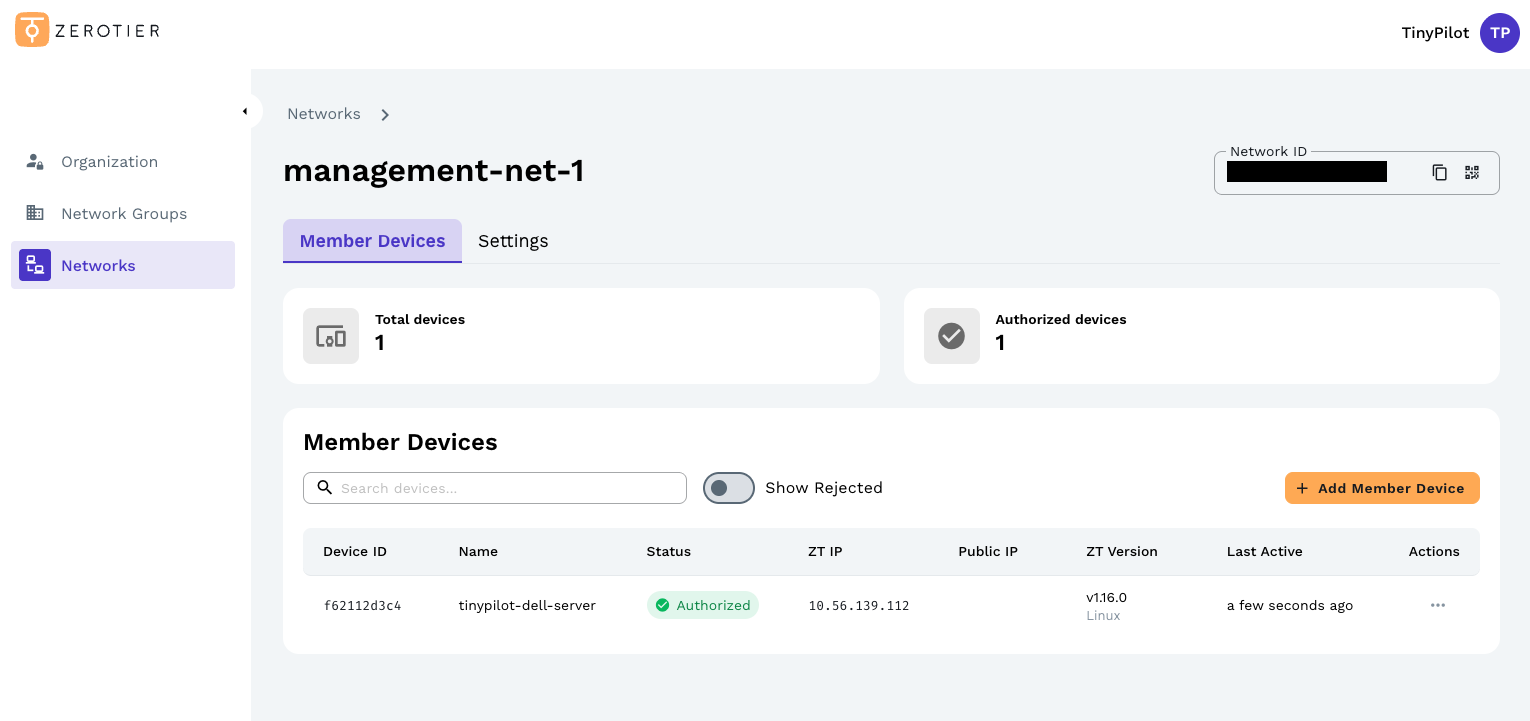
A few moments after your computer has joined your ZeroTier network, you will receive a message to authorize or reject this new Member Device in your ZeroTier Network tab. If this prompt does not show up, wait a few more moments and refresh your page.
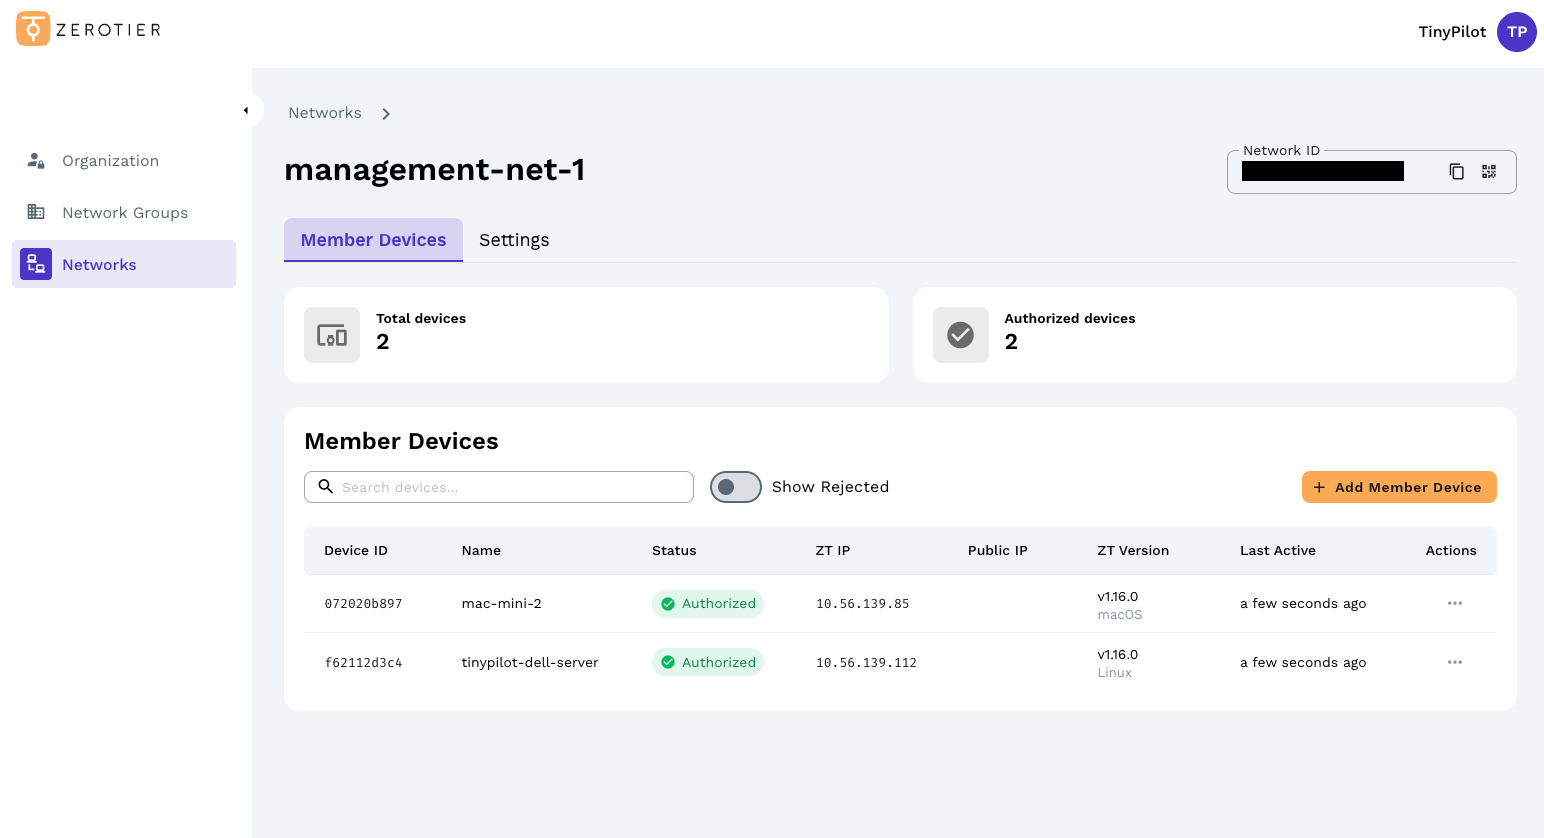
After you have authorized your computer as a new device, both devices should have a ZT IP assigned.
Access TinyPilot remotely
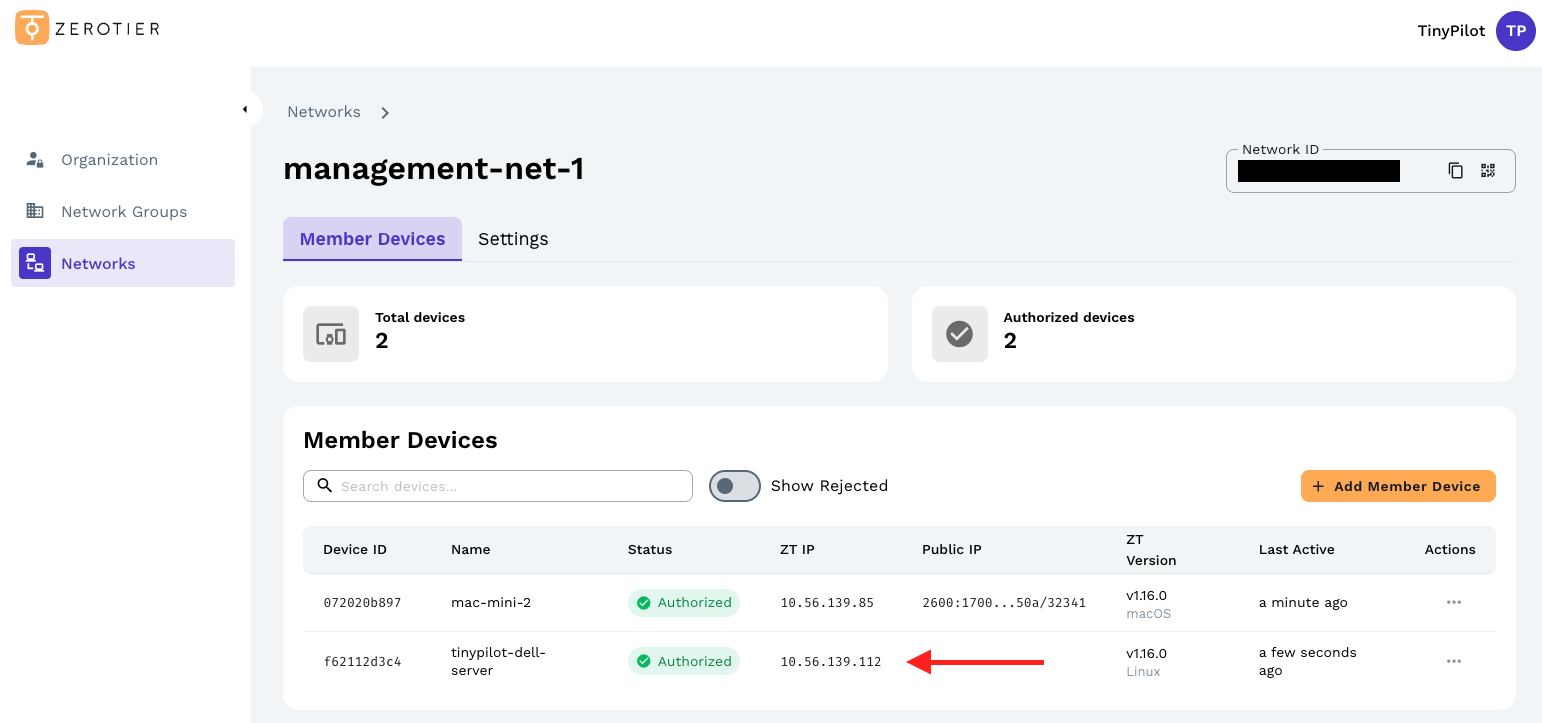
Now that your computer and your TinyPilot are on the private ZeroTier network, you can access your TinyPilot through its ZeroTier IP address.
Copy TinyPilot's IP address from ZeroTier's Networks tab:
Paste the IP address into the web browser on your computer. You should now see your TinyPilot web interface.
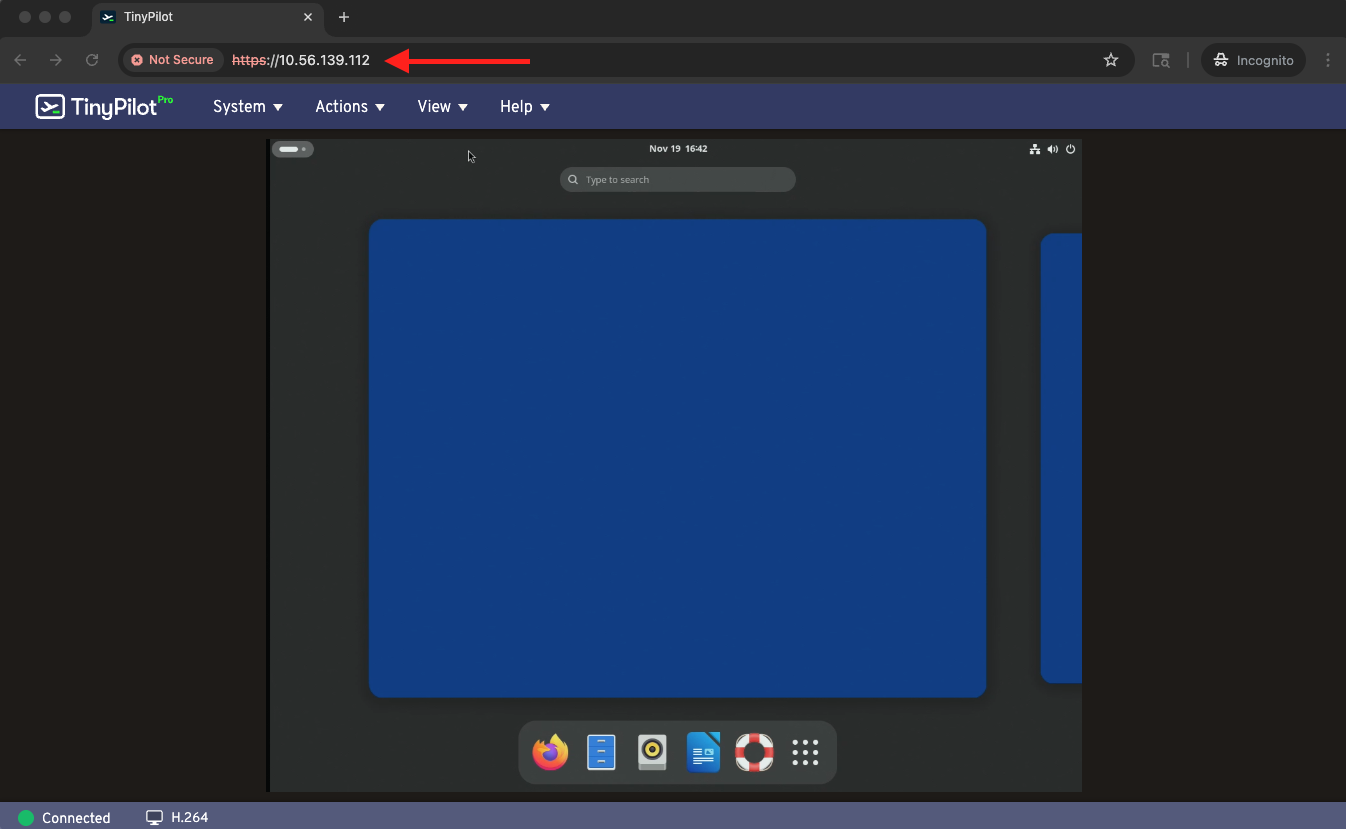
You can access your TinyPilot from anywhere on the Internet through this ZeroTier IP address.
Tuning performance
When using your TinyPilot over the internet with ZeroTier, you will likely see longer delays before your target machine registers your mouse or keyboard input.
For more information about tuning performance, see the FAQ article, "How can I reduce TinyPilot's latency?"